
 Deutsch
 Francais
 Nederlands


Here you can find DIY instructions with material lists
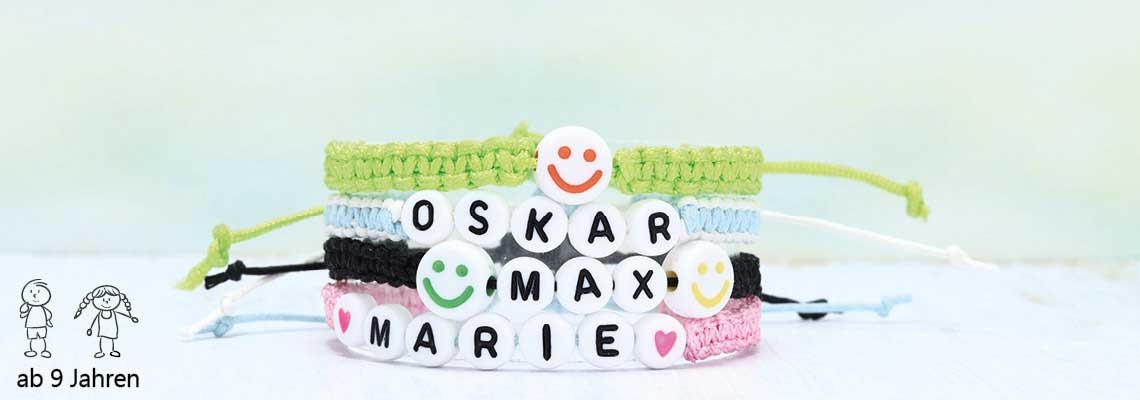
Ahoy! Knotting is not only on the ship! With a little time and patience you can knot your own macramé bracelet. The letter and smiley beads make it your own personalized and customized bracelet! Both cotton ribbon and nylon jewelry ribbon are suitable for macramé bracelets. Pay attention to the hole diameter of your beads! This determines the diameter of your retaining strap. So for a bead with 1.2 mm hole diameter you need a holding tape with a diameter of 1.0 mm or smaller! For holding and knot tape you can also use different tape thicknesses.
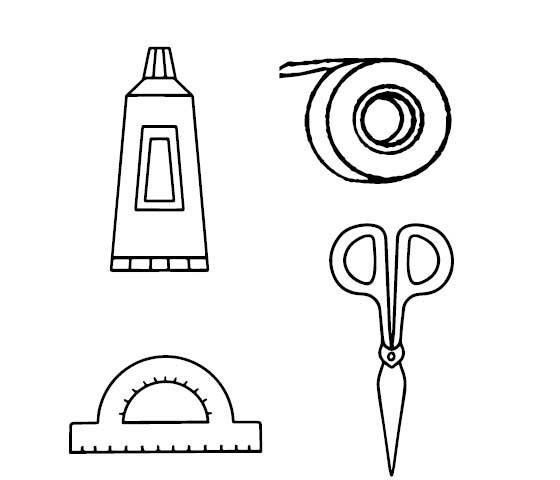
This is the tool you need for the macramé bracelets:
- Scissors to cut the ribbon
- Ruler or tape measure to measure the tape
- scotch tape to fix the bracelet on the table
- Glue to fix the knots
optional: macramé board for knotting the bracelet
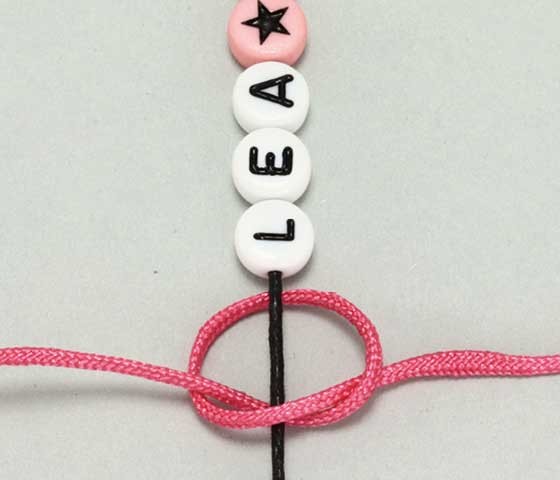
First cut a piece of ribbon at least 30 cm long (holding ribbon). Then thread the beads onto the ribbon. Slide the beads into the middle of the ribbon.
Then attach the holding tape to the top and bottom of the table with a strip of scotch tape. Alternatively, you can use a macramé board.
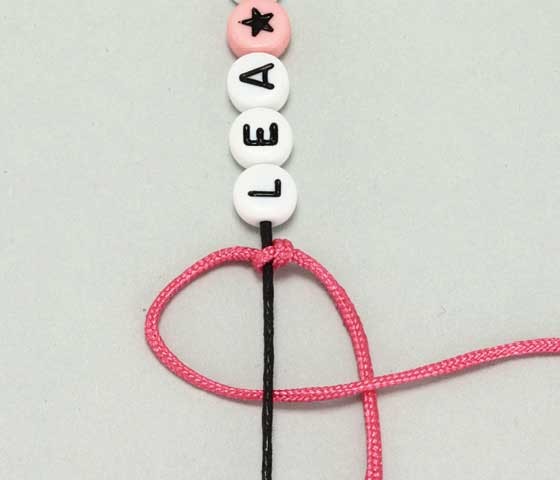
Then cut a piece about 40 cm long for the knotted thread. Place the thread on the beads under the retaining tape. Make a loop with the knotted thread around the holding tape and tighten it into a knot.
Now lay a 4. To do this, place the left tape under the holding thread in the middle and over the right tape. The tape now lies so that it looks like the number 4!

Now place the right band over both bands in the abdomen of the 4th row.

Now tighten the knot!

With the next knot you work mirror-inverted! With the right tape you lay a (mirror-inverted) 4. Then you lay the right tape under the holding thread in the middle and over the left tape.

Place the left band over both bands in the belly of the 4.

Tighten this knot as well.
Knot the ribbon in the same pattern on both sides of the letter beads.
How many knots you need to make depends on the circumference of your wrist. The best way to check the right length is this way:
Put the knotted bracelet around your wrist. The two ends of the bracelet should then have a distance of about 2 cm.

Carefully glue the last knots on both sides of the bracelet with super glue. So you have to glue four times. It's best to place a pad under the gluing points so that the glue doesn't spill onto the table!
After the glue has dried, cut off the protruding threads of the knot thread close to the knot.
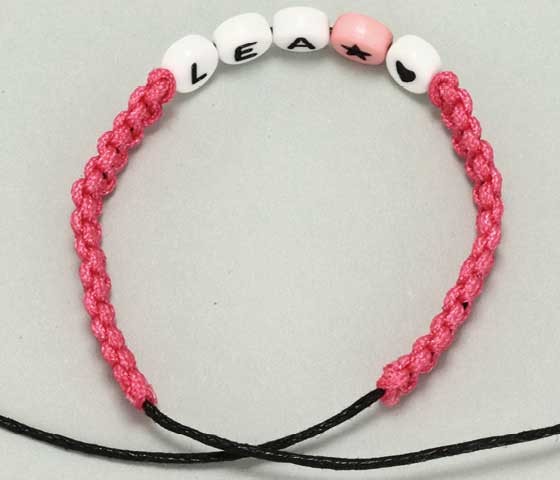
For the sliding closure, place the two ends of the holding thread on top of each other.
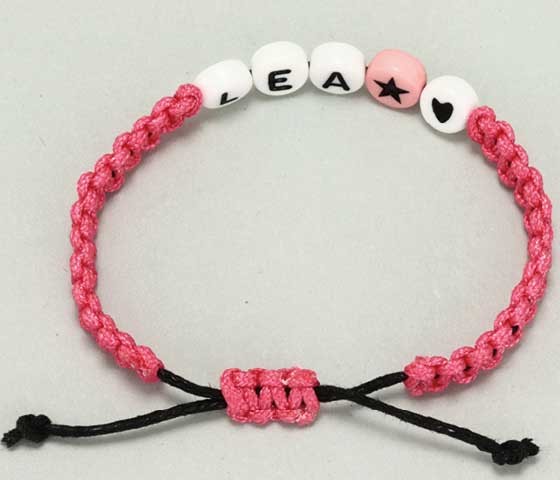
The shifting closure is also tied with the macramé knot.
Also here at the end, glue the last two knots with glue. But be careful! Do not glue the holding tape with. Then you can not move the clasp later! the remaining tape you can cut off after drying again.
Finally, make the bracelet bigger so that you can comfortably pull it over your hand. Now tie a knot on both sides of the strap. This will prevent the strap from slipping out of the clasp. Just cut off the excess ribbon behind both knots and go to ..... Done!

You can also find these instructions in our book!

Use a base when gluing!
Handling glue can sometimes be a bit tricky! It is important to use a base so that you don't spill glue all over the table. The best is an old plastic bag. Paper is not suitable. The finished bracelet could stick to the backing!