
 Deutsch
 Francais
 Nederlands


DIY basic instruction necklace with beads
In this tutorial we will show you step by step how to make a necklace yourself.

In this tutorial we show you step by step how to make a necklace yourself

First lay out the material and tools

Use the side cutters to cut an approx. 60 cm long piece from the wire roll. Pull a crimp bead onto the wire.
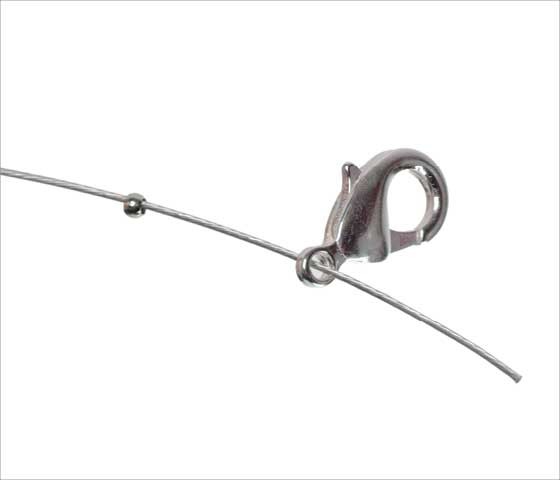
Next, also thread a carabiner on the wire.

Bend the wire into a loop and thread it back through the crimp bead.

Push the squeeze bead as close as possible to the carabiner and squeeze the squeeze bead with the flat nose pliers.

Next, thread the round metal bead onto the wire and slide it over the crimp bead. This will cover the crimp bead and make the necklace look professional. A bead that covers a crimp bead is also called a lamination bead.
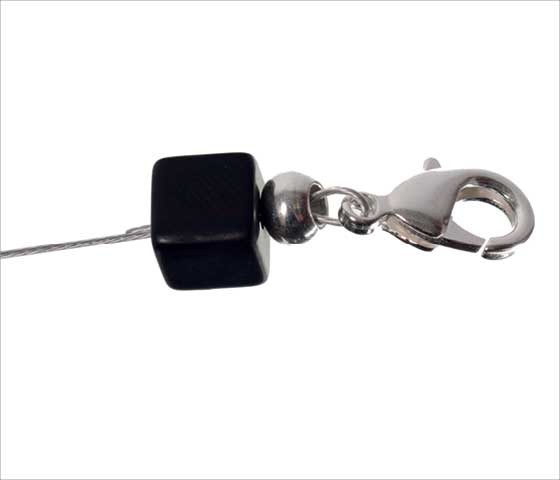
The excess end of the wire is not cut. This makes the closure of the chain more stable. Now thread the first beads on the wire and slide over the excess end of the wire. This way this wire can also be laminated.
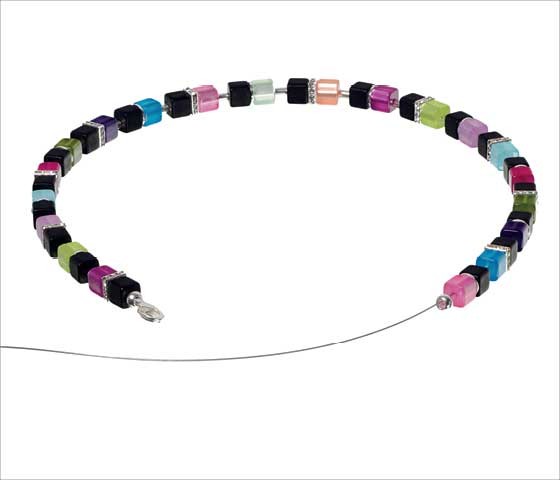
Thread all the beads onto the wire. At the end you will be left with a piece of wire about 10 cm long.

To finish the chain, thread the lamination bead onto the wire first, followed by a crimp bead.

Then thread on another binder ring.

The wire is threaded back through the squeeze bead

Continue pulling the wire through the crimp bead until only a small loop remains on the binding ring.

Now squeeze the squeeze bead together with the flat nose pliers.

Leave the remaining piece of wire again and thread it back through the last two to three beads of the chain. This gives the chain more stability again.

Pull the wire out of the bead with the help of the flat nose pliers.

A piece of wire now protrudes from the third bead

Cut off the protruding piece of wire
